Search Users Guide
A firewall object represents a real firewall device in your network. This firewall object will have interface and IP address objects that mirror the real interfaces and IP addresses of the actual device. In addition, the firewall object is where you create the access policy rule sets, NAT rule sets, and routing rule sets that you assign to your firewall device.
By default, a firewall has one Policy rule set, one NAT rule set, and one routing rule set. However, you can create more than one rule set of each type for a firewall. On the other hand, you don't have to populate all the default rule sets. You can, for example, create a Policy rule set and leave the NAT and Routing rule sets empty. Section 7.1 explains more about policies and rule sets.
To speed up the creation of a firewall object, Firewall Builder has a wizard that walks you through creating the object. The wizard has three options for creating a firewall object:
From a template: Firewall Builder comes with several pre-defined templates. You can use these to create a firewall that is close to your configuration, then modify it to fit your needs.
Manually: You can provide interface IP address, subnet mask, gateway, and other parameters manually. You can add this information when you create the firewall, or you can add it later. Section 5.2.2.1 (below) describes this process.
Using SNMP: Firewall Builder uses SNMP queries to learn about the network. Section 5.2.2.3 describes this process.
To start the firewall object creation wizard, right-click the folder in the User tree and select .
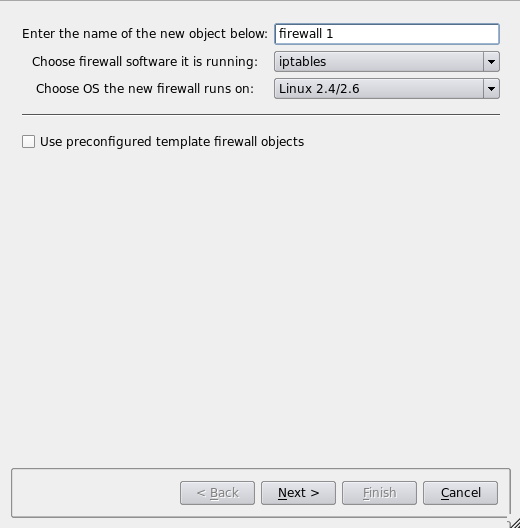
The first page of the wizard displays.
Give the firewall object a name. Usually, this name is the same name you assigned to the device, but it need not be if you're assigning interfaces manually. (If you are use SNMP or DNS to populate the interfaces, then the name must be the same as the device name.) Then specify the firewall software and device OS.
Leave the Use pre-configured template firewall objects checkbox unchecked.
Click .
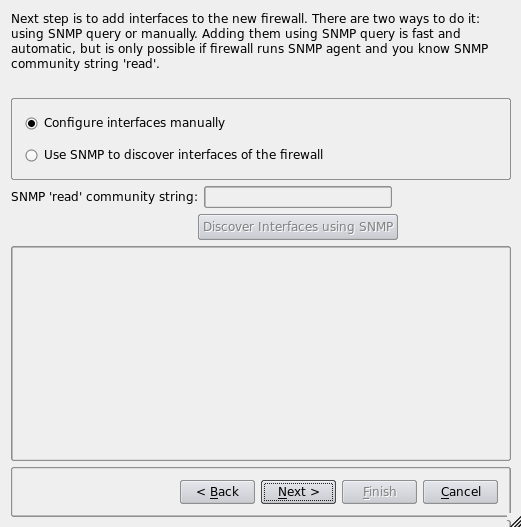
Select and click .
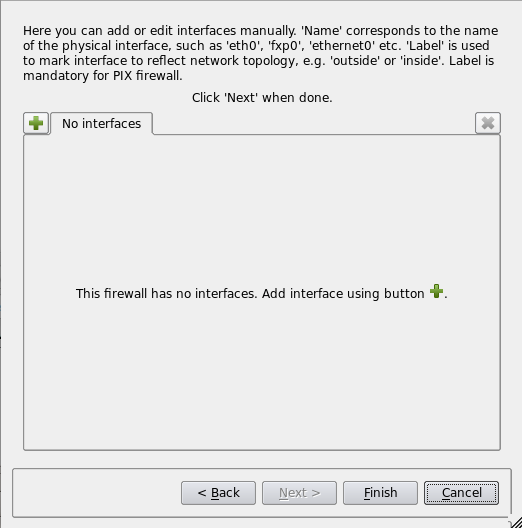
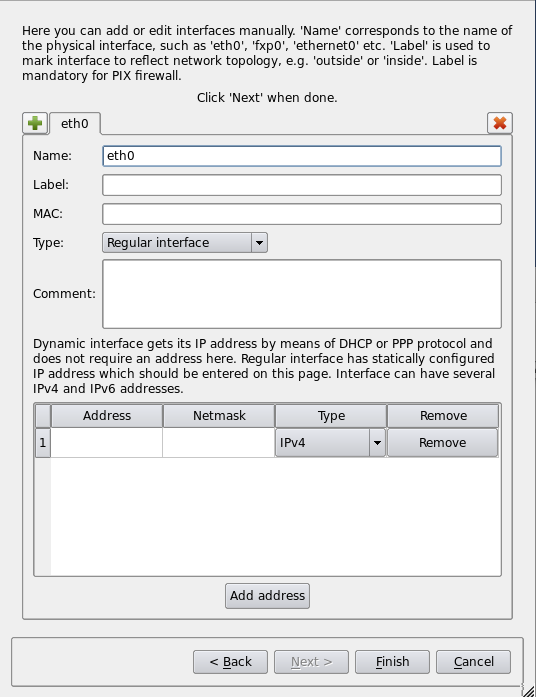
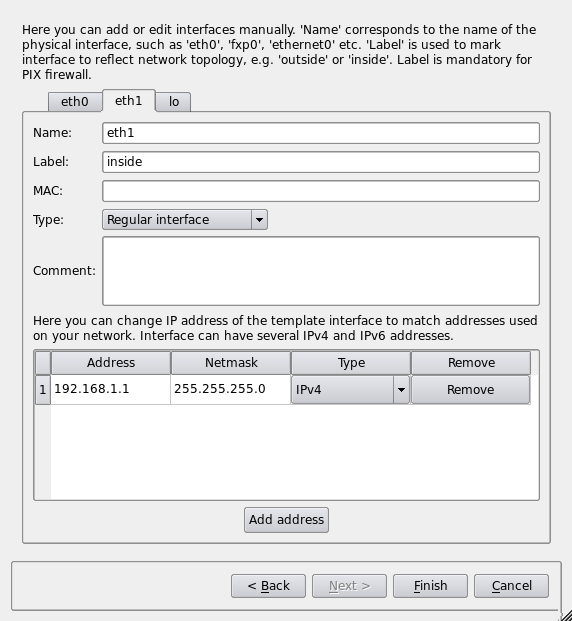
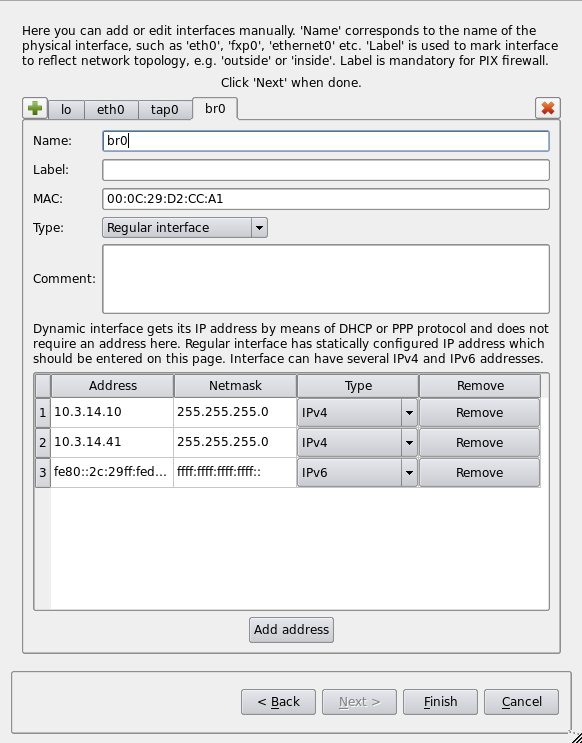
This is the page where you can add interfaces to the firewall. In this page of the dialog, each interface is represented by a tab in the tabbed widget. Use the "+" button in the upper left corner to add a new interface. The "x" button in the upper right corner deletes an interface. Click the "+" button to create first interface and give it the name "eth0":
To add an IP address to the interface, click in the table cell in the "Address" column and begin typing the address. The cell becomes an editable field that lets you enter the address. Add the network mask using the table cell in the "Netmask" column. The "Type" drop-down list lets you choose between IPv4 and IPv6 addresses. The network mask field accepts both full numeric notation and bit length for IPv4 netmasks. For IPv6, only bit length is allowed. The "Remove" button removes the address. You can add several addresses to the same interface.
The following elements are available on this page of the wizard:
Name: The name of the interface object in Firewall Builder must match exactly the name of the interface of the firewall machine it represents. This will be something like "eth0", "eth1", "en0", "br0", and so on.
Label: On most OSs this field is not used and serves the purpose of a descriptive label. On the Cisco PIX, however, the label is mandatory, and must reflect the network topology. Firewall Builder GUI uses the label, if it is not blank, to label interfaces in the tree. One of the suggested uses for this field is to mark interfaces to reflect the network topology ("outside" or "inside", for example) or interface purpose ("web frontend" or "backup subnet", for example).
MAC: If you like, you can also specify the interface physical address. The MAC address is not necessary, but it can be used to prevent spoofing. If the feature is turned on and available, the firewall only accepts packets from the given IP address if the MAC address matches the one specified. Section 5.2.9.1 has more information.
Interface type: Indicates the type of interface. Section 5.2.5 explains the interface types in more detail. Briefly, though, a Regular interface has a static IP addresses, a Dynamic address interface has a dynamic address provided by something like DHCP, an Unnumbered interface never has an IP address (a PPPoE connection, for example), and a Bridge port is an interface that is bridged in the firewall.
Comment: free-form text field used for the comment.
Address: If the interface has a static IP address, specify it here.
Netmask: Use either a traditional netmask (255.255.255.0) or bit length (24, without slash) to specify the interface netmask. For IPv6 addresses, only bit length notation is accepted.
Once all the interfaces are configured, click to create the new firewall object.
Note
You can always add, modify, and delete interfaces later using controls provided in the main window.
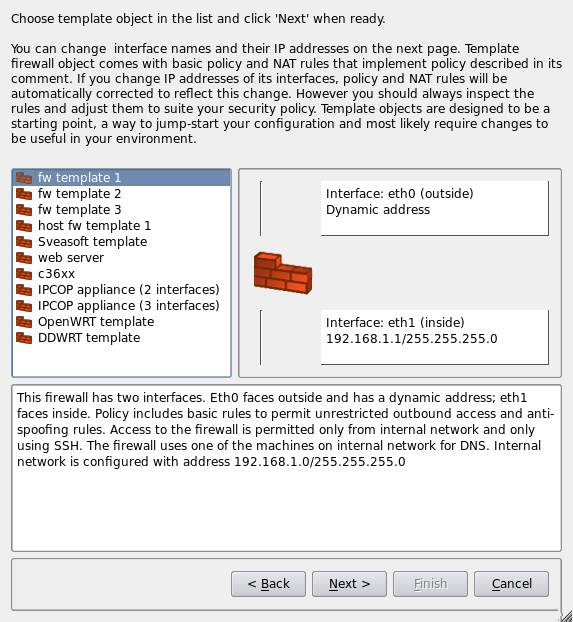
Another method you can use to create new firewall object is based on the use of preconfigured template objects that come with the program. To do this, select the "Use preconfigured template firewall objects" checkbox on the first page of the wizard Figure 5.1, then click .
The program comes with several template objects. These include firewalls with two or three interfaces, a couple of firewall configurations intended for a server with one interface, templates for OpenWRT, DD-WRT, and IPCOP firewalls, and a Cisco router. Each template is configured with IP addresses and basic rules. Some templates assume all interfaces have static IP addresses, while other assume some interfaces have dynamic addresses. These template objects are intended to be a start, something you can and should edit and modify to match your network configuration and security policy.
Choose the template that is closest to your configuration and click .
This page of the wizard allows you to change IP addresses used in the template. This is a new feature in Release 4.0 relative to Release 3.0. You can add and remove addresses using the and buttons. Since configuration of the template object depends on its interfaces, the dialog does not let you add or remove interfaces for objects created from a template. Each interface is represented by a tab in the tabbed widget; you can switch between them clicking the tabs with the interface names. Section 5.2.2.1 lists all elements of this page of the dialog and explains their purpose.
Each template firewall object comes preconfigured with some basic rules that use the firewall object, its interfaces, and network objects that represent subnets attached to interfaces. If you change addresses of interfaces in this page of the wizard, the program automatically finds all network objects used in the template rules matching old addresses and replaces them with new network objects representing subnets with addresses you entered in the wizard. This feature saves you from having to find and replace these objects manually.
Once all interfaces and addresses are entered or modified, click to create the firewall object.
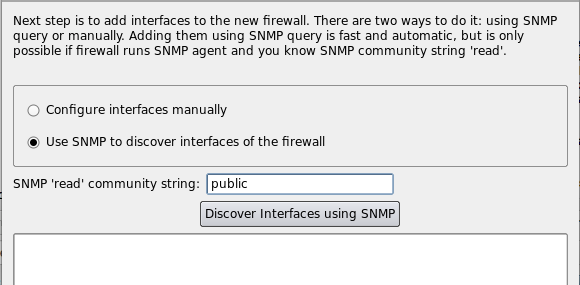
If your firewall runs an SNMP daemon, you can save yourself some time by using SNMP discovery to automatically create the interfaces of the new firewall object.
Start by checking the Use SNMP to discover interfaces of the firewall checkbox on the second page of the wizard and enter your SNMP "read" community. Then click .
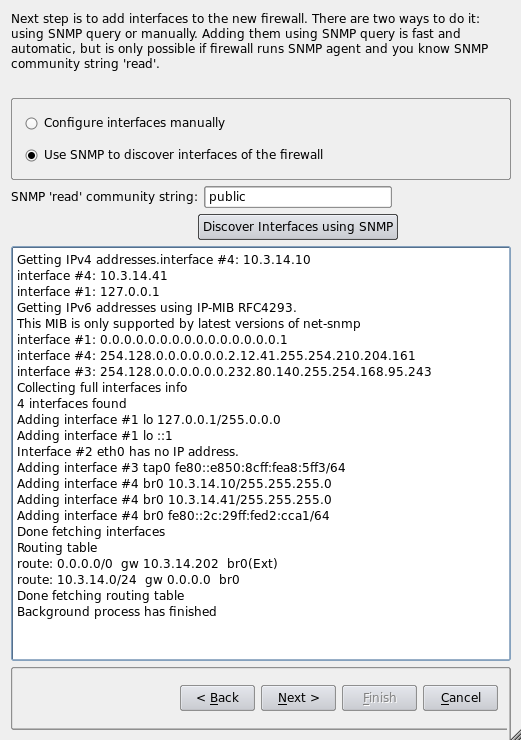
The program runs a series of SNMP queries to the firewall to read the list of interfaces and their addresses. Both IPv4 and IPv6 address can be imported. For IPv6, the firewall must support IP-MIB RFC 4293. Once the discovery process finishes, click .
The next page of the wizard offers an opportunity to review the discovered interfaces and make adjustments, if necessary. This is the same page described previously in Section 5.2.2.1. You can add and remove interfaces and add, remove, or change their IP addresses. Section 5.2.2.1 lists all elements of this page of the dialog and explains the purpose of each.
When configuration of all interfaces is correct, click to create the new firewall object.
The firewall object represents the firewall machine and is the most complex object in Firewall Builder. It has three sets of controls that you can modify, not including the policy rule sets. All these controls become available when you double-click the firewall object in the tree.
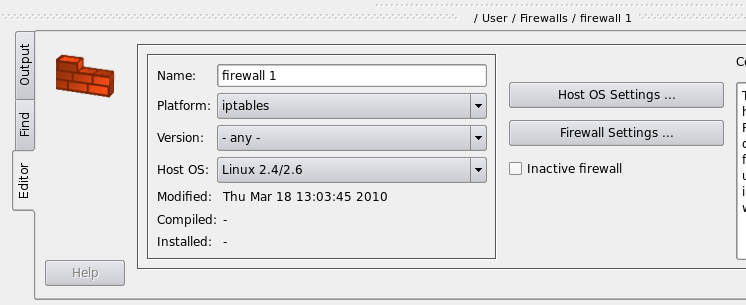
These controls let you specify the basic settings of the firewall, such as the name and firewall platform.
Name: Specify or change the name of the firewall object.
Platform: Specify or change the firewall software.
Version: Specify or change the version number of the firewall software. In most cases, you can leave this set to any. In general, setting the version to "any" means the compiler only supports options available in all supported versions of the software. If you need a feature that is supported only by a particular version, then specify that version.
Host OS: Specify or change the host operating system of the firewall device.
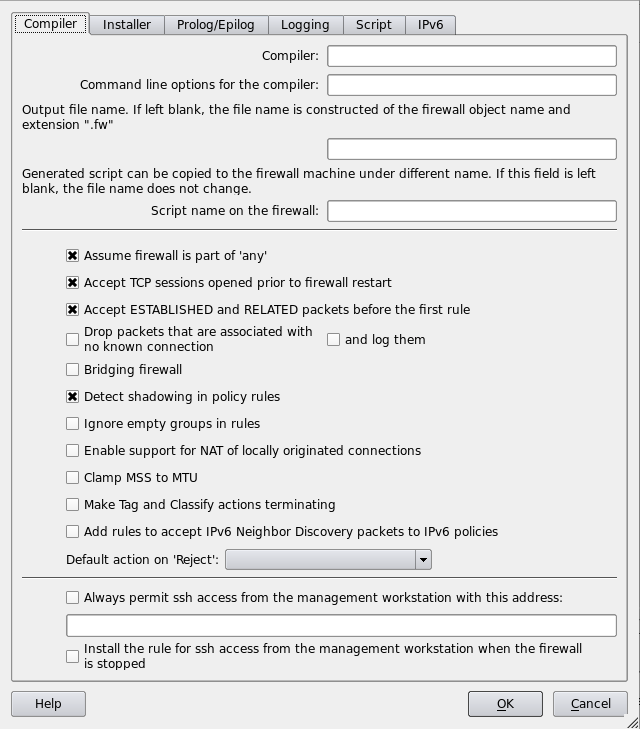
: Opens the Advanced Settings dialog for the platform or firewall software. Click in the dialog for assistance with dialog options. See Section 5.2.2.4.3 for a screen shot.
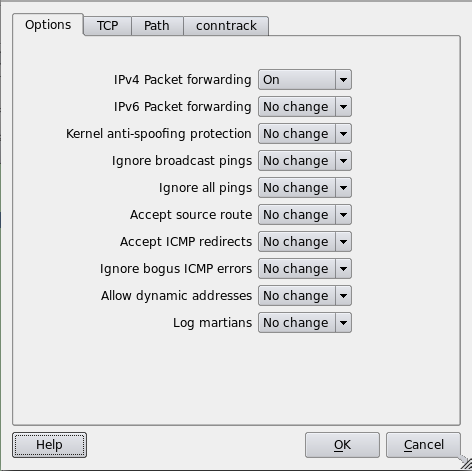
: Opens the Advanced Settings dialog for the indicated Host OS. Click in the dialog for assistance with dialog options. See Section 5.2.2.4.2 for a screen shot.
Inactive firewall: Check this box to make the firewall object inactive. The firewall name changes from bold to a regular font to indicate that it is inactive, and the firewall is not available for compiling or installation. Essentially, this is a way to "comment out" the firewall object without deleting it.
For explanations of the various controls, click the Help button in the dialog.
Copyright © 2000-2012 NetCitadel, Inc. All rights reserved.
Using free CSS Templates.

