Search Users Guide
After a firewall configuration has been generated by one of the policy compilers and saved in a file on disk in the format required by the target firewall, it needs to be transferred to the firewall machine and activated. This function is performed by the component we call "Policy Installer", which is part of the Firewall Builder GUI.
In the process of doing the installation, you will have to provide the password to your firewall. If you end up doing the installation several times, such as while troubleshooting, you will have to enter your password several times. Alternatively, you can select Enable password caching in the Installer tab of the Preferences dialog. Then, your password will be cached for the duration of the Firewall Builder session. However, the password will not be written to disk at any time. Figure 4.31 has more information.
The installer needs to be able to copy the generated firewall script to the firewall and then run it there. In order to do so, it uses secure shell (ssh). The program does not include ssh code; it uses an external ssh client. On Linux, BSD and Mac OS X it uses the standard ssh client ssh and secure shell file copy program SCP that come with the system; on Windows it uses plink.exe and pscp.exe. The full directory path to the ssh client program can be configured in the Preferences dialog (accessible via Edit/Preferences menu). However if you are on Linux, *BSD or Mac and use the standard ssh client available via your PATH environment variable, you do not need to change the default value there.
Installer works differently depending on the target platform. In the case of Linux and BSD-based firewalls, it uses SCP to copy the generated configuration files to the firewall machine and then uses ssh to log in and run the script. In the case of Cisco routers or ASA appliance (PIX), what it does depends on the version of IOS or PIX configured in the Firewall object. For old versions that do not support scp, it logs in, switches to enable and then configuration mode and executes configuration commands one by one in a manner similar to expect scripts. It inspects the router's replies looking for errors and stops if it detects one. In the end, it issues the command write mem to store the new configuration in memory, then logs out. Newer versions of IOS and PIX support scp and fwbuilder installer takes advantage of this. In this case it copies generated script to the router or firewall and then executes it using "copy file running-config" command. It does not use "config replace" command because configuration created by fwbuilder is incomplete and should be merged with running config rather than replace it. Section 10.6 and Section 10.7 have more details.
The built-in policy installer has been designed to work with a dedicated firewall machine. In other words, the computer where you run Firewall Builder and the actual firewall are different machines. Nevertheless, it can be used when they are the same machine as well. The only difference is that in all commands below you would use the name or address of the machine where you run Firewall Builder instead of the name or address of the dedicated firewall. The SSH client will then connect back to the same machine where it runs and everything will work exactly the same as if it was different computer.
Create directory /etc/fw/ on your firewall.
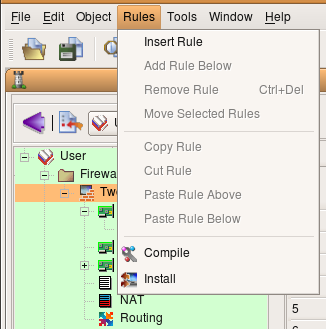
Now let's install the script using Firewall Builder's "install" functionality. Open your object file, if it isn't open already, then select .
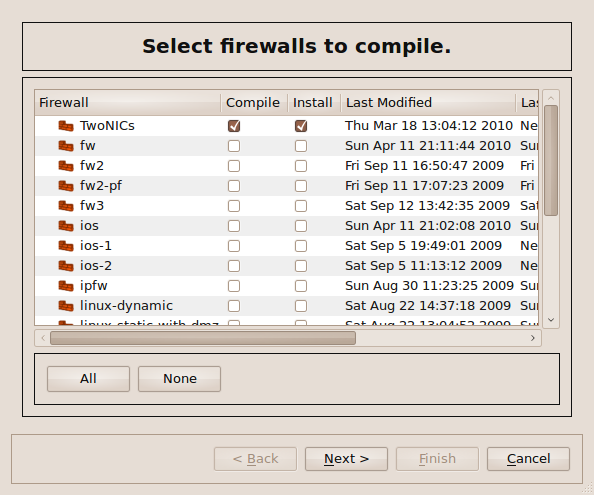
The following dialog appears:
As you can see, a list of all firewalls in the object file appear. Not all Compile checkboxes are checked by default. This is because Firewall Builder keeps track of the last time the firewall was compiled and also keeps track of any changes since then. If the firewall has not changed since the last compile, that firewall is unchecked by default because no compile is needed.
You can see which firewalls have been modified since their last compile by looking at the object tree. If a firewall has been compiled since it was last modified, it appears in normal font. If it has not been compiled since its last modification, it appears in bold.
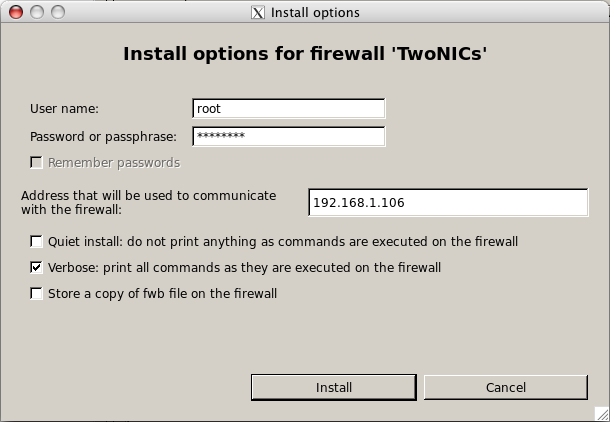
Make sure the Install checkbox is checked next to the firewall you want to install (and the Compile checkbox if you've made changes since th e last compile), then click . The following dialog appears:
Enter the root username and password for the device, and specify the IP address of the management interface of the device.
Then click .
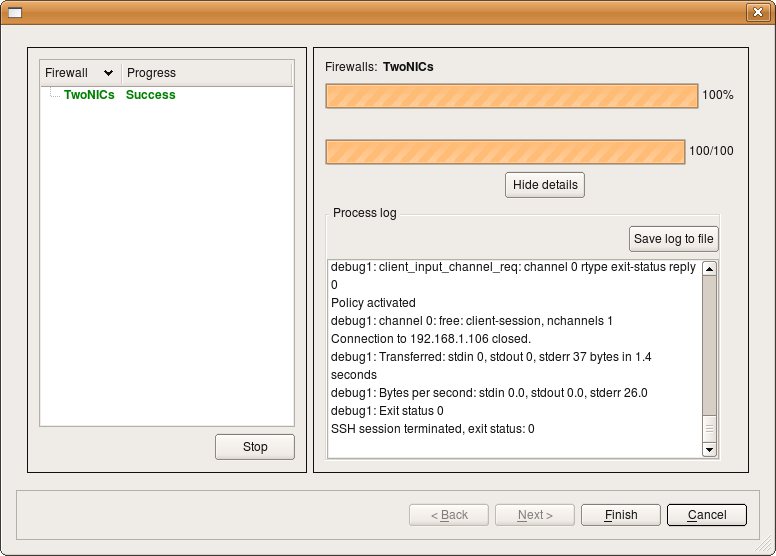
If everything goes well, the following dialog appears and reports success. (If not, it will report failure. The log will tell you what went wrong. If the error is unclear, see Section 15.3.)
Log into the firewall to see the policy in place. For iptables, run sudo iptables -L.
Copyright © 2000-2012 NetCitadel, Inc. All rights reserved.
Using free CSS Templates.


