Search Users Guide
One of the distinguishing features that Firewall Builder provides is support for automated object creation. This helps populate the objects tree for large networks with lots of hosts and subnets. What might take hours to do manually, the Discovery Druid wizard can help you do in minutes.
To start the Discovery Druid, select /.
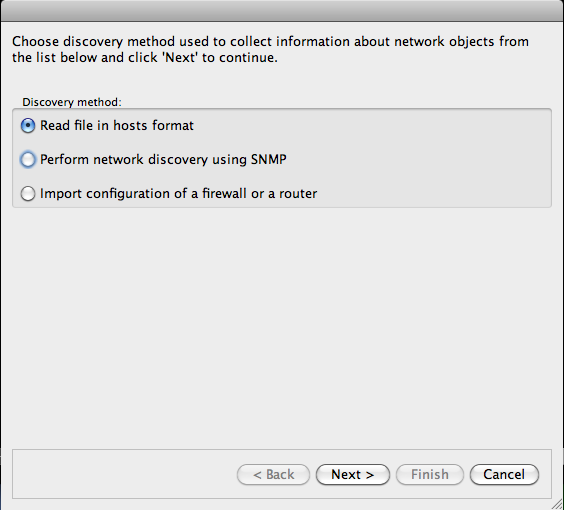
The Discovery Druid supports three main methods for automated object creation:
Reading the /etc/hosts file
Performing network discovery using SNMP queries
Importing the configuration of a firewall or router
You choose the method on the first page of the Druid ( Figure 6.1. )
Just check the radio button next to the method you want to use and click .
This method imports the host records present in the standard /etc/hosts file or any other file that contain records in the following format (this format is actually described in the manual page hosts(5)).
IP_Address host_name
The IP address must be separated from the host name with any number of spaces or tab symbols. Lines starting with '#' are considered comments and are ignored.
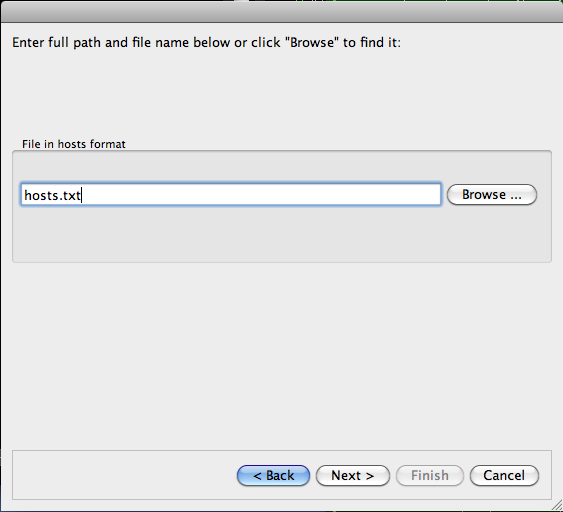
When you choose the import from /etc/hosts on the first page, the Druid asks you for the file path and name on the next page. Once that information is entered, it reads the contents of that file and presents a table of new networks (Figure 6.2).
Once you have chosen the file, click Next to let the program read and parse it. The file should be in "/etc/hosts" format; that is it should have an address and host name on each line, separated by any number of white spaces. Here is an example:
192.2.0.1 test1
192.2.0.2 test2
10.1.1.2  serv2
10.1.1.3  serv3
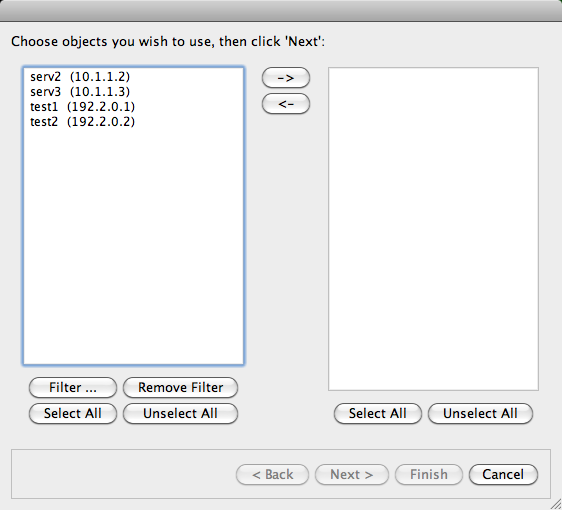
Once the program finishes importing, you can click Next to move on to the next page where you can choose which of the addresses you want to use:
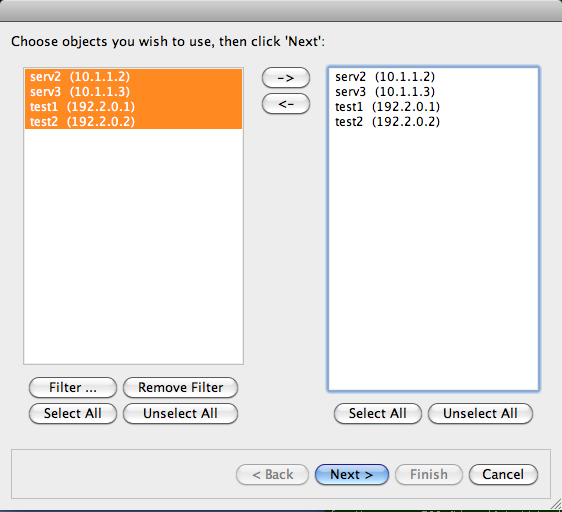
You can select any number of addresses in the left panel and use buttons "-->" and "<--" to add or remove them to the panel on the right. The "Select All" and "Unselect All" buttons help to work with large lists of addresses.
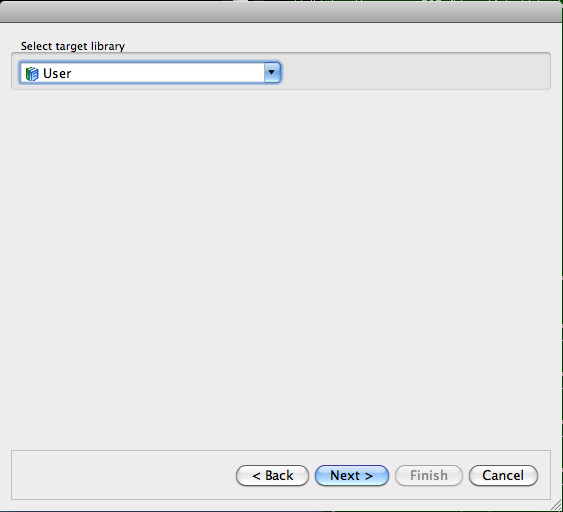
Choose the object library where new address objects should be created on the next page:
Once you click Finish, object are created and shown in the tree:
Copyright © 2000-2012 NetCitadel, Inc. All rights reserved.
Using free CSS Templates.

