Search Users Guide
Existing firewall configurations can be imported into Firewall Builder using the Import Firewall wizard. Import is supported for the following platforms.
- iptables
- Cisco IOS router access-lists
- Cisco ASA / Cisco PIX (requires Firewall Builder V4.2 or greater)
- PF
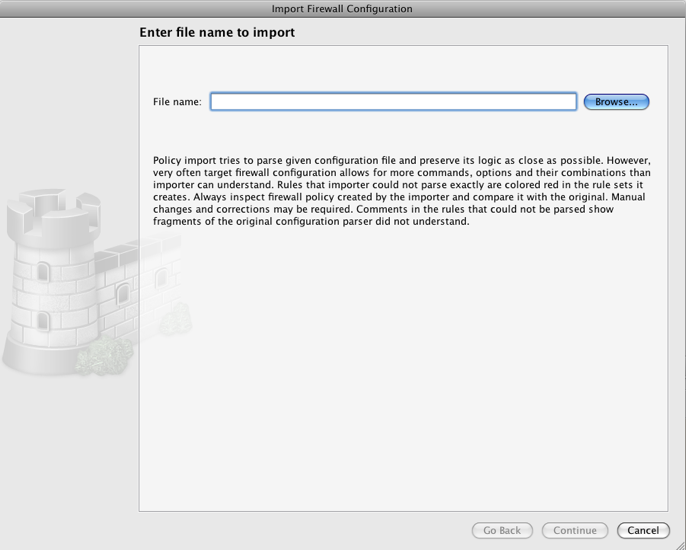
To start the Import Firewall wizard select the File -> Import Firewall menu item. This launches the wizard as shown in Figure 6.21.
To start the import process, use the Browse function to select the file that contains the firewall configuration that you want to import.
Note
iptables
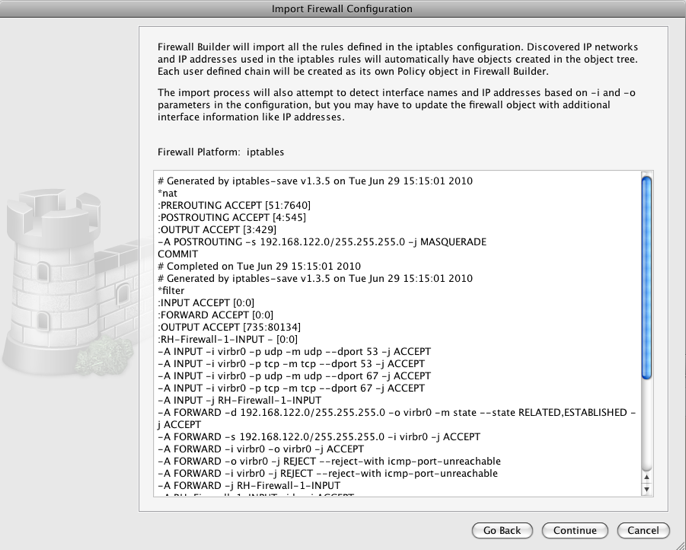
The configuration file format must be in the iptables-save format. For example, run the "iptables-save > myfirewall.conf" command on the firewall you want to import, transfer that file to the system running the Firewall Builder application and select this file in the import wizard.
Cisco IOS router access-lists
Cisco IOS router access-lists must be in the format displayed when the "show run" command is executed. Copy the output from the "show run" command to a file on the system that Firewall Builder is running on.
Cisco ASA / Cisco PIX
Cisco ASA and Cisco PIX configurations must be in the format displayed when the "show run" command is executed. Copy the output from the "show run" command to a file an the system that Firewall Builder is running on.
PF
PF configurations must be in a single pf.conf configuration file, Firewall Builder does not support anchors with external files. All configurations must make use of the "quick" keyword. For more information see Section 6.3.3.
After you have selected the configuration file to import click on the Continue button.
Firewall Builder will automatically detect the type of configuration file that is being imported and will display a preview of the file in the window.
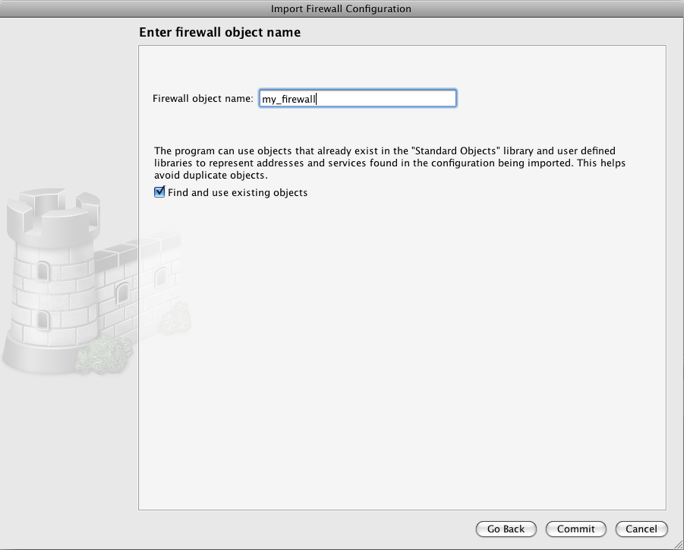
Click the Continue button. On the next page, shown in Figure 6.23, enter a name for the firewall object that will be created.
Note
By default, the option to "Find and use existing objects" is enabled. When this option is enabled Firewall Builder will attempt to match elements in in the firewall's configuration file with objects that are already configured in the Firewall Builder object tree. This includes both Standard Library objects and objects the user has created.
For example, if an imported firewall configuration file has an object or rule that uses TCP port 22, SSH, Firewall Builder will match that to the pre-existing Standard ssh object instead of creating a new TCP service object.
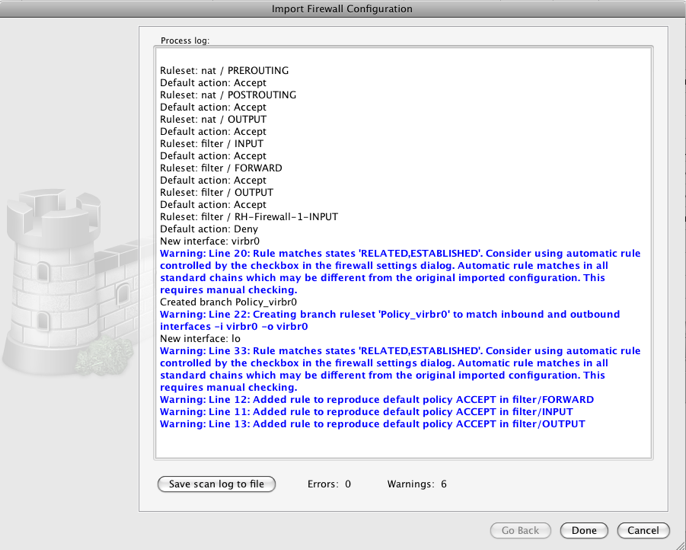
After entering the firewall object name, click Commit. Firewall Builder will show a log of the import process and will include any warning messages in blue colored text and any error messages in red colored text.
Depending on the platform, this will either be the final step of the wizard or the user will be guided through platform specific configuration activities.
Cisco ASA/PIX/FWSM
Note
Firewall Builder will not properly import objects whose names start with a number instead of a letter. For example, an object group with the name "10-net" will not be imported, but the object group with the name "net-10" will be imported.
Copyright © 2000-2012 NetCitadel, Inc. All rights reserved.
Using free CSS Templates.


